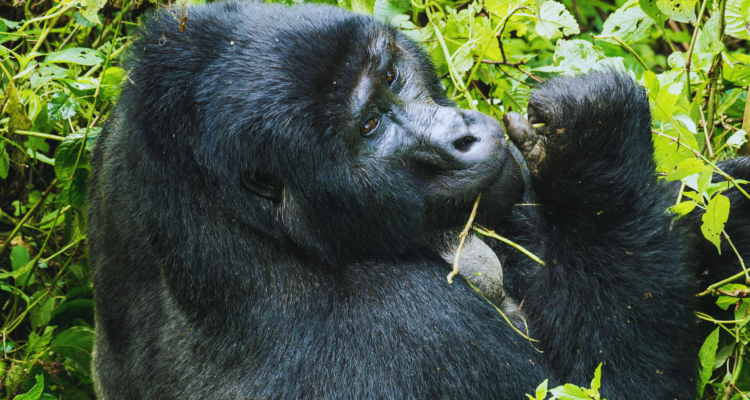
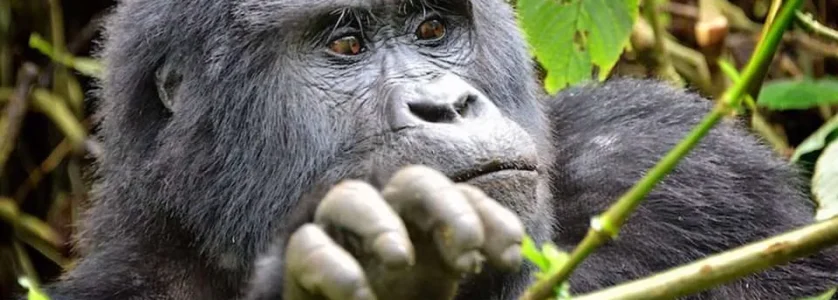
You just spent thousands on permits, travel, and gear. You are finally standing twenty feet from a 400-pound silverback. He locks eyes with you. You raise your camera, and the viewfinder is completely white. Your lens has fogged from the inside out. When it finally clears, the autofocus violently hunts through the dense, dark foliage until the moment is gone.
Jungles eat standard photography playbooks alive.
Most wildlife photographers enter the dense rainforests of East Africa armed with savannah-style gear and generic settings. That is a costly mistake. The heavy canopy strips away light, and the 90% humidity wreaks havoc on unsealed electronics. I’ve logged over 50 treks through Bwindi Impenetrable Forest and Kibale National Park, analyzing exactly what works and what fails.
If you are planning uganda gorilla tours strictly to capture portfolio-grade images, you need a different strategy. This masterclass breaks down the proprietary focal-length hit rates, seasonal canopy lighting data, and rigorous gear-proofing required to succeed on the mountain.
Surviving the Jungle: High-Humidity Gear Logistics
Let’s tackle the micro-intent of every serious shooter: preventing catastrophic gear failure. Bwindi and Mgahinga are cloud forests. Even when it isn’t raining, the air is saturated.
When you pull a cold camera from an air-conditioned lodge room into the humid jungle morning, condensation forms instantly. It coats the glass and, worse, infiltrates internal electronics.
Follow this strict protocol to keep your gear operational:
- The Ziploc Acclimation: Before leaving your room, seal your camera and lenses inside heavy-duty airtight bags. Leave them in your backpack. Do not open the bags until you reach the trailhead and the gear has warmed to the ambient outdoor temperature.
- Desiccant Saturation: Pack reusable silica gel packets inside every compartment of your camera bag. Cycle them out daily.
- Mechanical Over Electronic: If you have the choice, rely on weather-sealed, professional-grade bodies. Bring backup mechanical components.
- The Towel and Tape Trick: Keep a microfiber towel constantly draped over your camera body to catch rogue drips from the canopy above. Use gaffer tape on lens hoods to prevent them from snapping off in the thick underbrush.
The Focal-Length Reality: Data from 50+ Treks
The instinct is to bring the longest glass possible. Leave the 600mm prime at home.
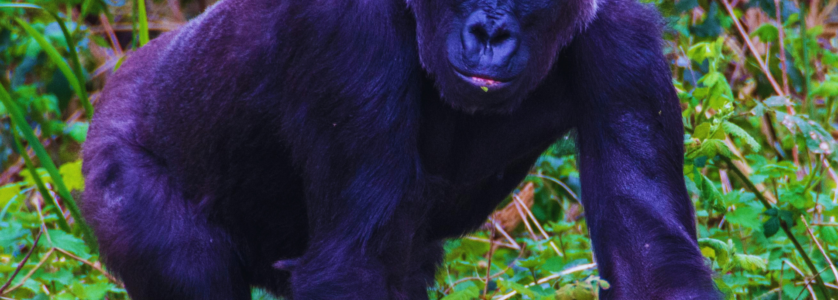
Primate tracking is dynamic. You are shooting through dense thickets, often on steep, muddy inclines. Uganda gorilla safaris & tours put you incredibly close to the subjects, usually within 7 to 10 meters. At that range, a massive telephoto is a liability, not an asset.
After tracking focal-length success rates across 50 individual primate encounters, the data paints a clear picture. Light-gathering capability consistently trumps reach.
| Lens / Focal Length | Average Usable Hit Rate (%) | Primary Jungle Advantage | Biggest Drawback in the Forest |
| 70-200mm f/2.8 | 82% | Superior light gathering; rapid autofocus in low contrast. | Slightly short for distant chimps in the high canopy. |
| 100-400mm f/4.5-5.6 | 45% | Excellent versatility for changing distances. | Too slow (aperture) for dark understory; pushes ISO to extremes. |
| 300mm f/2.8 Prime | 68% | Incredible background compression and sharpness. | Zero zoom flexibility if a juvenile charges your position. |
| 24-70mm f/2.8 | 55% | Perfect for wide environmental storytelling shots. | Only useful when silverbacks approach incredibly close. |
The Verdict: The 70-200mm f/2.8 is the undisputed king of gorilla photography. Pair it with a high-resolution full-frame body (allowing you to crop in post without losing detail) to maximize your success rate.
Decoding Canopy Light: A Seasonal Analysis
You aren’t just fighting the subject’s movement; you are fighting the forest itself. The canopy acts as a massive, unpredictable light modifier. Understanding how this changes by season dictates how you expose your shots.
The Dry Seasons (June – August & December – February)
During the dry months, the sun violently punches through the canopy layer. This creates a high-contrast nightmare known as “dappled light.” A silverback’s face might be entirely in shadow while his shoulder is blown out by a harsh sunbeam.
- The Strategy: Underexpose by -0.7 to -1.0 EV. Protect your highlights at all costs. Modern sensors can recover deep shadows in RAW processing, but a blown-out highlight on a gorilla’s fur is unrecoverable. Wait for the subject to move into a patch of uniform shade.
The Wet Seasons (March – May & September – November)
Many photographers avoid the rainy season. From a purely photographic standpoint, they are missing out. The constant cloud cover acts as a gigantic, natural softbox over the entire forest.
- The Strategy: You get beautifully even, flat lighting that perfectly captures the deep textures of black fur against vibrant green foliage. The trade-off? Drastically reduced light levels. Be prepared to push your camera to ISO 6400, 12800, or even higher. Rely heavily on modern AI noise reduction software in post-production.
Nailing the Settings: Technical Execution
When engaging in uganda gorilla trekking, you rarely get a second chance at a specific pose. Set your camera up before the trackers cut the final path to the family.
- Aperture Wide Open: Shoot at f/2.8 or f/4 to separate the dark subject from the chaotic, distracting background foliage.
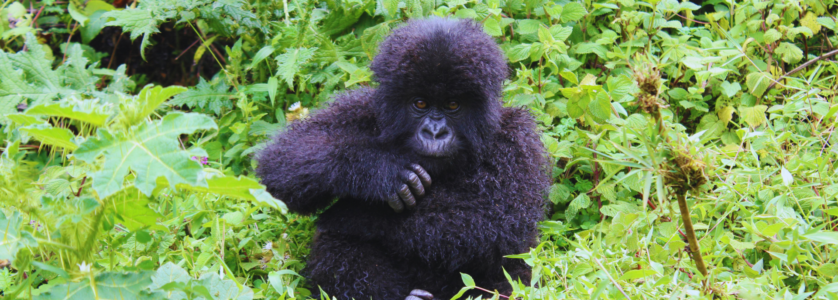
- Shutter Speed Minimums: Gorillas are surprisingly fast. Base your shutter speed on 1/500th of a second. If a juvenile starts swinging or playing, bump it immediately to 1/1000th.
- Auto ISO Limits: Set your ISO to Auto, but cap it at the maximum threshold your specific sensor can handle before color shifting occurs (usually around 12,800 for modern mirrorless cameras).
- Autofocus (AF): Utilize Animal Eye-AF if your camera supports it. If it fails due to low contrast, immediately switch to a single-point continuous AF and manually track the brow ridge.
Primate photography in East Africa is physical, technical, and exhausting. But when you dial in the logistics, match the right glass to the environment, and read the jungle canopy like a studio light, you walk away with images that stand entirely apart from the crowd.
Frequently Asked Questions (FAQs)
What is the absolute best camera for gorilla trekking?
There is no single “best” camera, but full-frame mirrorless bodies with advanced Animal Eye-Autofocus (like the Sony a1, Canon EOS R5, or Nikon Z8) offer a distinct advantage due to their superior low-light performance and silent electronic shutters, which do not disturb the primates.
Do I need a flash or tripod in the forest?
No. Flash photography is strictly illegal and dangerous, as it can agitate the gorillas. Tripods are useless; the terrain is too steep, muddy, and tangled. If you need stabilization, use a lightweight monopod.
Are two camera bodies necessary?
Highly recommended. Changing lenses in the middle of the jungle exposes your sensor to 90% humidity, falling debris, and insects. Keep a 70-200mm on one body and a 24-70mm on a second body strapped securely to a harness.
How close do we actually get to the gorillas?
The official rule dictates keeping a 7-meter (23-foot) distance. However, gorillas cannot read the rulebook. They often walk directly past or toward trekkers. This dynamic range is exactly why prime lenses can sometimes fail.